Showing posts with label DIYPROJECTS. Show all posts

Top 10 Essential Crafting Supplies

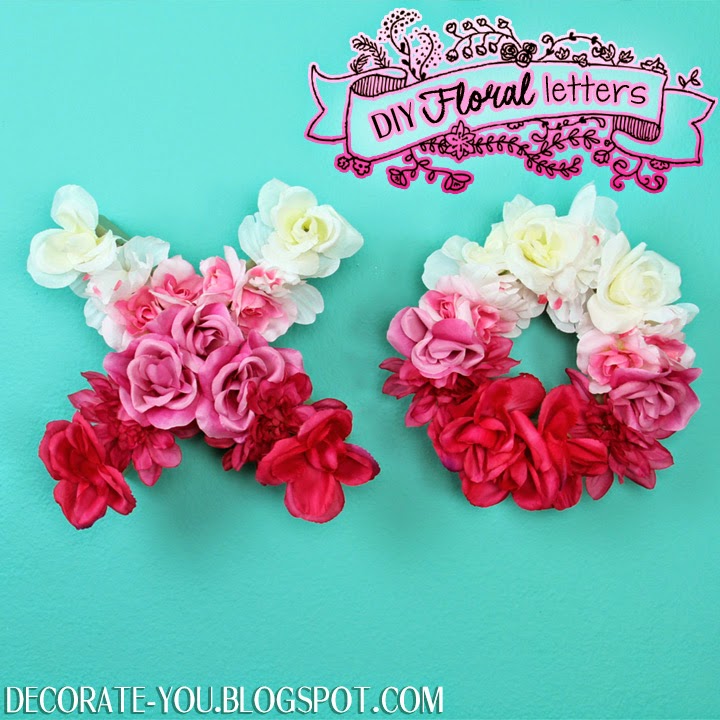
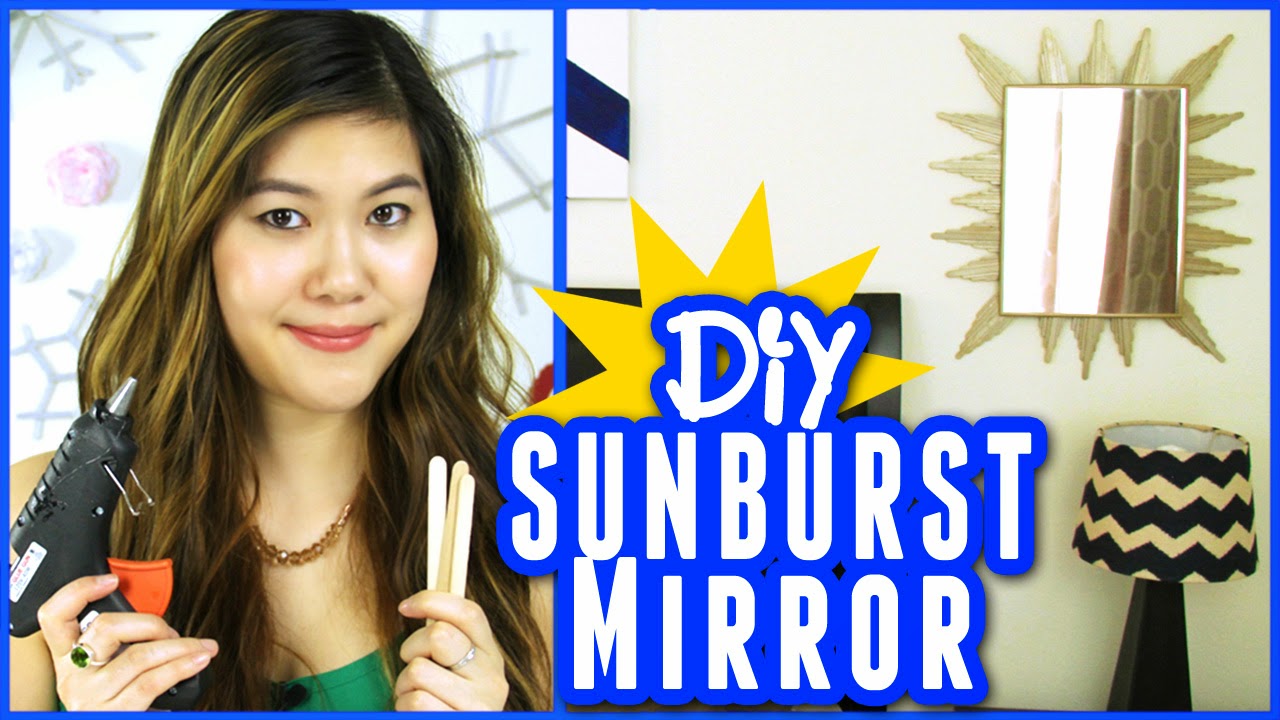
So lately I have been doing a lot of arts and crafts. The last few posts have been a bunch of DIY projects that mainly have to do with decor and organization. I made a pair of sunburst mirrors out of popsicle sticks, tumblr inspired canvas art, a ring dish, floral letters, a flower jar, and a necklace organizer. There are constantly some supplies we are using and I thought it would be handy to compile a list of essential crafting supplies. So here is a basic list of my essential crafting supplies:
  1. A GOOD hot glue gunDepending on whether you get a good one or a really cheap one, your hot glue gun will be either your best friend or your worst enemy. I think hot glue is the most convenient of glues because it dries quickly and provides a good quality of adhesion but it isn't permanent. I didn't realize how handy a good hot glue gun is and I use it often for many crafts.
  2. Spray paint Get at least your basic colors of such as black, white, and a clear overcoat. A good quality of spray paint will provide better coverage than a cheaper version. You can use spray paint to makeover anything from furniture to jewelry. You can spray paint basically anything to give it a new look!
  3. Painter’s tapeYou'll need this to mask off any areas you do not want to paint or spray paint. You can also create patterns, like chevron or stripes, with it. It's cheap and super satisfying to peel off a finished project.
  4. Loose glitterYou either love glitter or hate glitter. I love glitter. It's perfect for glamming up pretty much anything from shoes to a plastic toy.
  5. Mod PodgeThis product is great because it is an all-in-one glue, finisher, and sealer! 
  6. Paint/sponge brushesPaint and sponge brushes can obviously be used for painting. But they can also be used to spread glue, place glitter, and correct mistakes. 
  7. Glass bottles or jarsYou can save old candle jars or spaghetti source jars (or at least that's where I get them from). You can also buy Mason jars, they're pretty cheap. You can decorate them so they double as organizational items and room decor. You can also fill them up with goodies (from homemade sugar scrubs to hot cocoa ingredients) to give as gifts!
  8. E6000 glueI feel this is the holy grail of crafting glues. After this glue dries whatever you've glued together WILL NOT come apart, it's permanent. The drying time is longer than hot glue or Mod Podge but the quality of adhesion is far superior. It bonds together basically anything including wood, glass, plastic, ceramic, rubber, vinyl, and fiberglass to name a few things. A tube of this is pretty cheap and it also comes in black.
  9. A SHARP pair of scissors I think owning a pair of good sharp scissors is a basic necessity for just life in general. Who likes using dull scissors? When you're crafting the last thing I want to deal with is not being able to cut something because that pretty much kills my project and my motivation. 
  10. RibbonRibbon is both cute and practical. You can use ribbon in sewing projects as well as crafting projects. I've used it to do a lot of things from neatly package gift jars to hanging decor I've made. It's cheap, lightweight, and comes in a variety of colors, materials, and patterns!
Watch the video on our channel for more details!

Tell us what you think! Send us your photos on Instagram or Twitter using #decorateyou

DIY Magnets Using Dollar Tree Supplies

I decided to get a bit crafty and make some cute magnets using Dollar Tree supplies! This was a fun and quick project that only took a couple minutes to create and cost under $5! You can make these for your fridge or use them for your locker. Read on to see what I used to make these and don't forget to watch the video tutorial at the end of this post for the step by step instructions

Materials:
  • Magazines
  • Mod Podge
  • Half Marbles
  • Magnetic Buttons 
  • Pencil
  • Paint Brush
  • Scissor
Watch the video on our channel for step by step instructions!

If you try out this out send us your photos on Instagram or Twitter using #decorateyou

    DIY Empty Frame Wall Art

    I needed a cheap and beautiful way to update an empty wall in my kitchen. It is a rental and I didn't want to waste time or money painting so I had to come up with something else. I love the way empty painted frames look as wall art and I love it even more now that I have it in my rental. Please view the video at the bottom of this post to see how I transformed a boring wall in my home into one of my favorites.

    Materials:
    • A selection of wall frames
    • Spray Paint in color of choice

    Watch the video on our channel for step by step instructions!


    If you try out this out send us your photos on Instagram or Twitter using #decorateyou

    Top 10 Essential Crafting Supplies


    You'll find a lot of DIY crafts on our YouTube channel. After a while I realized that we are constantly using the same supplies. These crafting essentials are basics that you'll need if you decide to start doing crafts more often. To find out what these cheap and essential items watch the short video below! Happy Crafting! :)

    Watch the video on our channel for the list!

    What items are most important to you? Send us photos on Instagram or Twitter using #decorateyou

    How To Fall Asleep Fast & Sleep Better! DIY Lavender Linen Spray


    I'm having trouble falling asleep lately. I know lavender oil aromatherapy helps some people not only go to sleep but sleep well. I didn't want to just drop oil onto my pillowcase and leave small oil stains so I decided to make a bottle of DIY lavender linen spray. Read on the see how it's done! 


    Ingredients:
    • an empty spray bottle
    • 1/2 cup vodka 
    • 1/4 TSP (about 40 drops) lavender essential oil
    • 1 1/2 cups of distilled water
    • a measuring cup

    Watch the video on our channel for step by step instructions!


    If you try out this out send us your photos on Instagram or Twitter using #decorateyou 

    How to Make A DIY Ring Dish or Ring Holder Using Dollar Tree Crafts Supplies

    I think I've mentioned that I used to store all of my jewelry in a mirrored jewelry box. Well, as lovely as that box was I really wanted a way to showcase my jewelry. I already made a DIY necklace holder, check out the video at the end of this post. So now I've decided to make a cute ring dish. I think the best part of this project is that it only cost me $2!! I already had most of the supplies, I only needed to go to the Dollar Tree and buy the tea light candle dish and the plastic toy.


    Lately, I've seen a bunch of ring dishes for sale with adorable animals as the holders. Well, the best part of making your own ring dish is customizing it any way you want. I decided to go with a diplodocus, which I spray painted ivory and ombre'd in gold glitter. Keep reading to see what you'll need for this project!

    Materials:
    • Glitter 
    • Glitter nail polish 
    • A paint brush 
    • Spray paint
    • Plastic animal of choice 
    • E6000 glue 
    • Glass tea light candle dish
    Watch the video on our channel for step by step instructions!

    If you try out this out send us your photos on Instagram or Twitter using #decorateyou 

    Check out my step by step tutorial on how to make a DIY necklace holder!

    Room Decor: Dollar Store Crafts- DIY Floral Letters


    Although it's still cold outside, I can't help but to think about Spring and warm weather! I'm ready for blooming flowers and I'm kind of tired of waiting for them. So I decided to create DIY floral letters to liven up my room.


    You can create letters by cutting and hot gluing the foam blocks and rings in different arrangements. I kept it simple by choosing X and O. This project is SUPER simple and costs less than $10!! All my supplies are from the Dollar Tree, keep reading to see how to make these quick DIY floral letters!


    Materials:
    • Hot glue gun
    • Scissors
    • Gentle Grip Green Foam Floral Blocks
    • Green Foam Floral Ring
    • Faux Flowers
    Watch the video on our channel for step by step instructions!


    If you try out this out send us your photos on Instagram or Twitter using #decorateyou 


    Check out my video on how to make your own DIY Floral Crown!


    Room Decor: DIY Wall Canvas Art

    I'm currently redecorating my room and I wanted to add some wall decor above my headboard. Since I already made sunburst mirrors to go above the nightstands on either side of the bed, I decided to paint some canvases! Just in case you're wondering about the scale of the paintings to the bed I have a king size bed. I LOVE how these came out and how perfectly they go with the sunburst mirrors I made.
    Materials:
    • 2 20"x24" canvases
    • acrylic paints of your choice
    • a stencil (I found mine by searching for "antler stencils" on Google)
    • scissors
    • painter's tape
    • paint brushes
    • a painter's palette or a plate to pour your paint on

    Watch the video on our channel for step by step instructions!


    If you try out this out send us your photos on Instagram or Twitter using #decorateyou 

    Check out the video tutorial on how I made the sunburst mirrors!


    Room Decor: DIY Sunburst Mirror


    I love using mirrors as wall decor because not only are they functional but they can also make a room appear larger. I'm currently decorating my room and I was looking for a pair of gold sunburst mirrors to go over my nightstands. Unfortunately, they cost A LOT. So I decided to make some of my own! Keep reading to find out how I made these!


    Materials (for 1 mirror):
    • 2 packs of 150 Popsicle craft sticks
    • gold spray paint
    • hot glue sticks
    • hot glue gun
    • ribbon
    • scissors

    They were super easy and inexpensive. I LOVE how they turned out! Step by step video at the bottom of the article!


    Stacking the popsicle sticks give your sunburst mirrors dimension! Making the individual sunbursts is easy and does take a while, but it's pretty fun!


    Watch the video on our channel for step by step instructions!


    If you try out this out send us your photos on Instagram or Twitter using #decorateyou 

    Room Decor: DIY Jar Crafts

    Mason jars and other adorable looking jars are very trendy right now. They're great not only to store things in but also serve to as decor themselves! I decided to re-purpose an old jar into a flower jar to keep on my coffee table. I only needed a few easy things for this simple and inexpensive project!


    Materials:

    • Old jar to repurpose
    • Fabric puff paint (any color, it'll be spray painted over)
    • Spray paint (any color you want) 
    • Marker
    Watch the video on our channel for step by step instructions!


    If you try out this out send us your photos on Instagram or Twitter using #decorateyou 

    DIY Valentine's Day or Anniversary Gifts

    Whether you're celebrating Valentine's Day or your anniversary it's always sweet to receive a handmade gift from your sweetheart! It's nice to know that they spent the time to create something special for you. So this Valentine's day I decided to make a few things for my boyfriend! These projects are HIM OR HER gifts. Keep reading to find out how to make these extremely simply, thoughtful and inexpensive DIY projects.

    Personalized "I Love You More Than" Card

    Materials:
    • Card stock paper
    • Markers
    • Colored paper or stationary paper
    • Scissors
    Watch the video at the bottom of the blog for step by step instructions!

    DIY "Love" Collage Wall Decor

    Materials:
    • Mod Podge
    • Paint Brush
    • 8 photos printed out in 3"x3" squares
    • Photo printer paper
    • Scissors
    • 4 12"x12" canvases
    Watch the video at the bottom of the blog for step by step instructions!

    Annual Dates Bucket List & Memories Jars

    Materials:
    • 2 matching jars 
    • 1 can of spray paint
    • Ribbon
    • 2 gift labels
    Watch the video on our channel for step by step instructions!


    If you try out this project send us your photos on Instagram or Twitter using #decorateyou

    DIY Jewelry Organizer: Necklace Holder


    I have a BAZILLION necklaces! They're everywhere. It's a shame because I love how pretty they are and for the longest time I wished that there was a way to display AND organize them. I had a jewelry box but I really wanted to showcase my favorite necklace pieces. So I decided to make a DIY necklace organizer that involves NO DRILLING. This displays AND organizes my favorite pieces. It's also adorable by itself.


    This DIY organizer is definitely a fun day project. Oh also, this project can also be a unique present for someone! Read on to see what you need to do to make one of these awesome hanging necklace organizers.

    Materials:  

    • A corkboard
    • Painter's Tape
    • Spray paint
    • Knobs
    • Handles
    • Cup hooks
    • E6000 glue
    • Marker
    • Scissors

    To see step by step instructions watch the tutorial on our Youtube Channel below:


    Try out this tutorial out and send us a photo or message on Instagram or Twitter using the #decorateyou

    How To Make A Bow: No Sew!


    Bows are amazing. They're cute and are the perfect accessory. It's also really fun to make them. Here is a simple tutorial on how to make a bow without any sewing!

    Materials:

    • Fabric (light and thin such as linen)
    • Scissors
    • Hot Glue gun
    • Small Clip (such as a pin curl clip or and alligator clip)
    To see step by step instructions watch the tutorial on our Youtube Channel below:


    Try out this tutorial out and send us a photo or message on Instagram or Twitter using the #decorateyou

    DIY Winter Bedroom Decorations Tutorial

    There's nothing like cozy home decor to get you into a festive mood. Decorating your home in the winter shouldn't just be limited to Christmas themed decorations! I like making and using decorations that will last throughout the whole season. Below are the steps and materials to make DIY oversized metallic popiscle snowflakes and DIY glitter mason jar candle holder.

    DIY Over sized Metallic Popsicle Snowflakes

    These over sized popsicle snowflakes can be hung on your wall or from your ceiling. I've made different snowflakes to add some variety but painted them all silver to maintain a modern look. They're extremely simple to make and once you make one you'll want to make a hundred more!

    Materials:
    • Craft sticks, regular + mini
    • Hot Glue gun
    • Small 1-2 inch circles cut out of cardboard, or wooden discs.
    • Paint and brush
    • Double sided mounting tape (optional)
    Steps:
    1. Start with 5 or 6 craft sticks and hot lgue them evenly spaced apart to your cardboard circle.
    2. Add more craft sticks in a symetrical pattern until you ar happy with your design.
    3. Paint, spray paint of glitter your newly made snowflakes.
    4. Hang them from your mantle, ceiling or on a wall for a wintery touch.

    DIY Glitter Mason Jar Candle Holders

    I have an unhealthy urge to cover everything I own in glitter, but I manage to refrain most of the time. These sparkly mason jars will illuminate and reflect the glitter on them to project a calm glow. Enjoy using them during the holidays or all year long!

    Materials:
    • Glass Jar
    • Glitter
    • Mod Podge
    • Foam Brush
    • Tea Light (flame-less type candle if desired)
    Steps:
    1. Make sure your jar is clean and dry.
    2. Mix up some podge podge and glitter together.
    3. Paint the inside of your jar with the mixture.
    4. Let it dry. Place a tea light inside & enjoy.
    Click below to watch our DIY Winter Bedroom Decorations Tutorial video on our YouTubeChannel.


    Share your DIY projects with us by sending us a photo or message on Instagram or Twitter using the #decorateyou

    How To: DIY Glitter Heels Tutorial


    I love glitter and I want to put it on EVERYTHING. But since I'm no longer under the age of 10, glittering everything would make me seem insane so I have to use it sparingly now.  I decided to refashion some black heels by glittering the soles. Read on for easy step by step instructions!


    Materials:
    • 1 pair of heels
    • 1 foam brush or paint brush
    • Mod Podge (glossy or matte finish)
    • Sandpaper
    • Painters tape
    • Bowl
    • Glitter
    • Clear spray paint
    • Box or newspapers to work on

    Steps: 
    (Note: Remember to work OVER your box/newspaper!) 
    1. Sand down the soles of your heels to clean off any dirt and to create a better surface for the glitter to stick to.
    2. Use the painters tape to mask off all the areas you don't want to have glitter on. I taped over the bottom of the soles and heel (the parts that actually touch the floor). Don't forget to tape off the sides of your shoe.
    3. Using your brush, mix together a bit of glitter and Mod Podge in your bowl. A little Mod Podge goes a long way!
    4. Paint a thin layer of the glitter glue mixture onto the soles of your heels. Make sure you've painted the layer evenly so it doesn't dry in chunks.
    5. Before the glue dries, pour glitter directly over soles. Don't worry about using a lot of glitter, the excess glitter will fall off with a few shakes of your shoe. Make sure you've used enough glitter to cover painted area of the sole entirely.
    6. Allow about 30 minutes for the painted layer to dry. You can speed this up by using the warm and low setting of your blowdryer. Do this over a sink and away from any loose glitter!!!
    7. Coat another thin layer of the glitter glue mixture on top of your glittered sole to seal it.
    8. Allow 1 hour for your shoe to dry.
    9. Spray 1 coat of the clear spray paint over you glitter soles.
    10. Pair with any outfit to look amazing!
    Click below to watch our detailed step by step video tutorial on How To: Glitter Heels Tutorial on our YouTubeChannel.

    If you try on this craft share it with us by sending us a photo or message on Instagram or Twitter using the #decorateyou

      Throw the PERFECT Holiday/Christmas Party: No Bake Desserts + No Sew Antlers!


      Hosting a holiday party means planning everything from food to music. But you also CAN'T forget scrumptious dessert and your outfit! For my holiday party I decided to make no bake milk chocolate and white chocolate Oreo truffle balls. I also made adorable no sew felt reindeer antlers to pair with my Christmas/Holiday host look. Below are the steps, materials, and ingredients you'll need to make these items. Read on for easy step by step instructions!

      No Sew Felt Reindeer Antler HeadBand

      This festive reindeer antler headband is inexpensive, quick to make, and you DON'T HAVE TO SEW anything! You can pair this with any outfit to complete your holiday look.

      Materials:

      • 2 sheets Brown Felt
      • 1 sheet Red Felt
      • 1 Headband
      • Scissors
      • Hot Glue Gun
      • Gold Glitter Glue
      • Cotton Balls

      Steps:

      1. Draw an antler design on the brown felt and cut it out on both felts sheets.
      2. Glue newly cut antler shapes along the edge, leaving a hole in the bottom for stuffing.
      3. Stuff the antlers with cotton balls and glue the unfinished edge.
      4. Use the gold glitter glue to make polka dots on the reindeer antlers.
      5. Make a small red bow made from felt and hot glue it to the center of the antlers.
      6. Hot glue the antlers to the headband.

      No Bake Milk Chocolate & White Chocolate Oreo Truffles

      Yum! Cookie truffles covered in white or milk chocolate. Who wouldn't want one of these bite sized treats? These are extremely simple to make and DON'T REQUIRE ANY BAKING!

      Ingredients:

      • 30 Oreo Sandwich Cookies
      • 6 oz Philadelphia Cream Cheese
      • Milk & White Chocolate chips for melting

      Steps:

      1. Pulse Oreos in a food processor until they are crumbles.
      2. Add cream cheese and blend until no large chunks of Oreo is left.
      3. Scoop and roll the mixture into ball and place on baking sheet. Place them in the refrigerator for 10 minutes.
      4. Melt chocolate and coat the cookie balls, add any topping if desired. Place them in the freezer for 30 minutes.
      5. Put into mini cupcake liners and on a tray for guests to enjoy.

      Click below to watch our video tutorial on Throw the PERFECT Christmas Party: No Bake Desserts + No Sew Antlers! on our YouTubeChannel.


      If you try on this craft or recipe share it with us by sending us a photo or message on Instagram or Twitter using the #decorateyou


      How to Make Tissue Paper Flowers

      Every time someone sees a tissue paper flower arrangement I have made I always get the infamous question "You made these?!". This simple budget friendly craft seems to have a big impact on many and it brings me joy to look at as well. Buying fresh flowers can get expensive unless you grow them yourself, which I'm unable to do since a green thumb is one of those things I don't have. I can recreate all the loveliness of real flowers in my home without many of the concerns that come with buying or growing flowers. Nothing beats the real thing, but these come pretty close.


      To make tissue paper flowers you will need:
      • Tissue Paper
      • Scissors
      • Pipe Cleaner or stapler
      • A cup or round object to trace
      • Marker (optional)
      Click below to watch the full Tissue Paper Flower tutorial on our YouTube Channel!


      Where will you use these in your home? Or maybe for a party? Let us know! If you try this project use #decorateyou and share it with us!

      DIY Cut Out Sweater

      Fall is the beginning of sweater season. I was going through my sweater collection and came across a plain grey sweatshirt from Target. Feeling crafty I decided to be adventurous with a pair of scissors. I wanted to give my bleak sweatshirt an edgy makeover. So I decided to make peekaboo sleeves and cut some slits into the sleeves and the back.


      You will need:
      • 1 sweatshirt
      • 1 pair of scissors
      • Measuring tape
      • A ruler or something with a straight edge
      • A light colored Sharpie

      Click on the video below to watch my DIY cut out sweater tutorial on our YouTube Channel!

      If you try this out send us a photo on Instagram or Twitter using the #decorateyou!